Can anyone identify the special tool required for these heatsink screws?
#1
Brick  Can anyone identify the special tool required for these heatsink screws?
Hi All,
I'm hot on the heels of fixing another Indy Nidec...this one has a shorted secondary diode and took me too long to find!  Now the Nidec's use a "Screw" that's somewhere in the M3 x 0.50 area but aren't screws.  They are threaded tubes with a multi-point head that also turns into a hex-like shaft.  I've pretty much destroyed one getting it off.  Normal Hex and torx or pentalobe don't work (just grind).

Here's a picture of the fastener, 
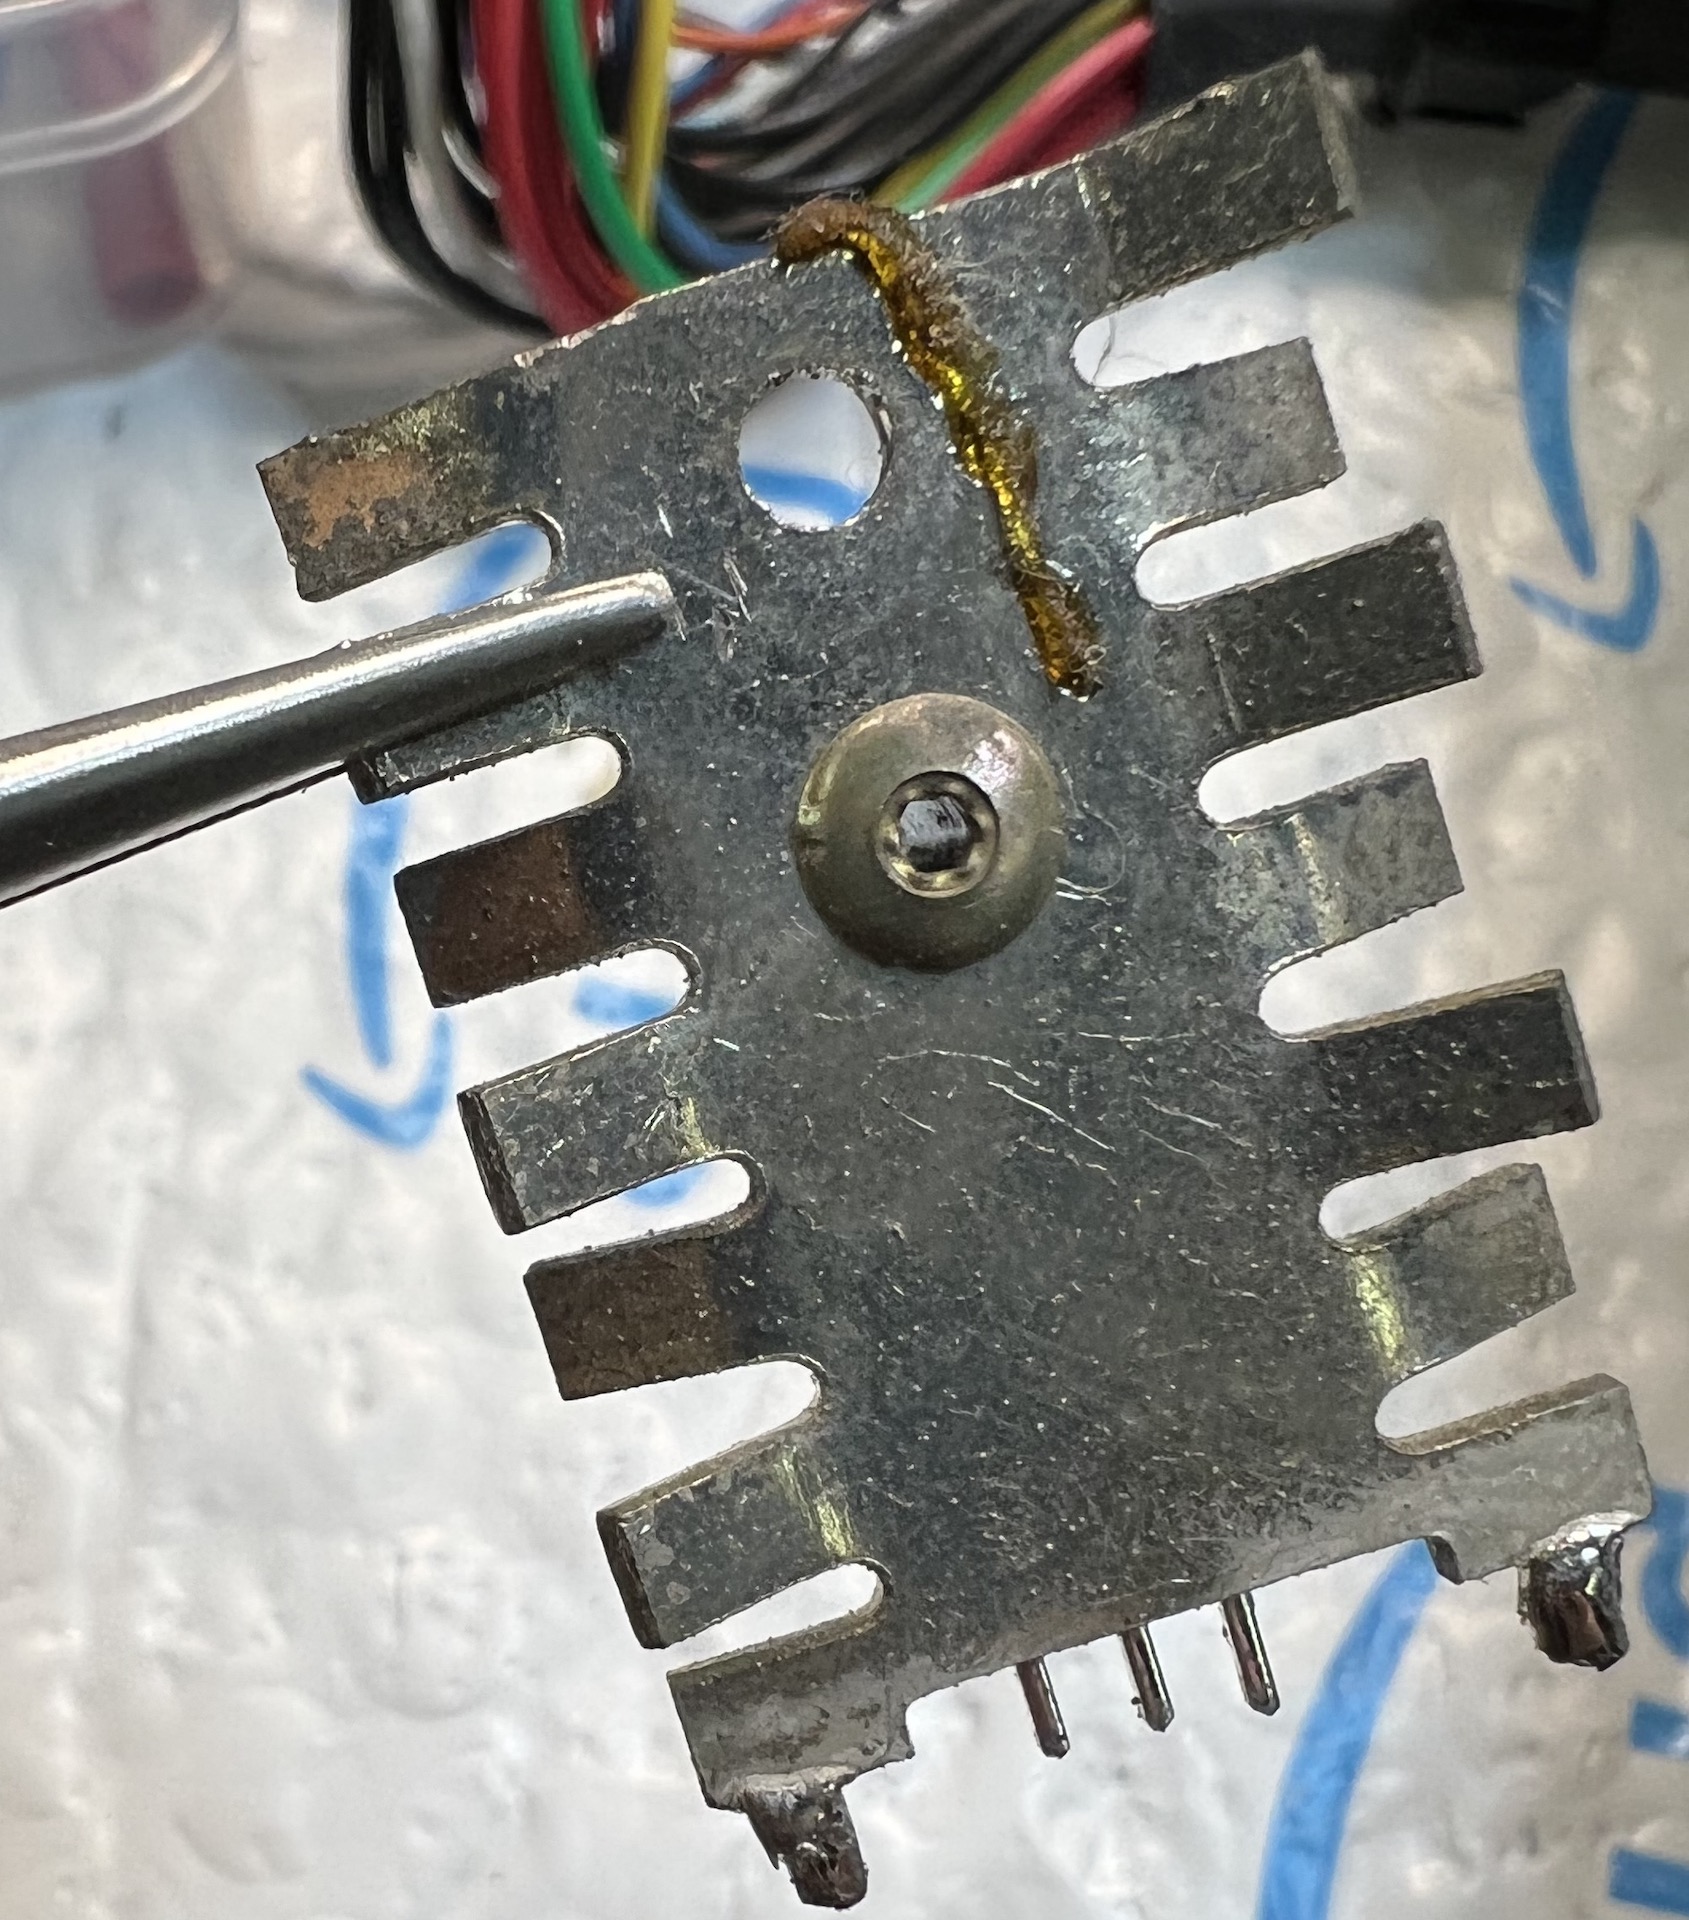
   

it obviously takes a special "driver" but I cannot seem to use any terms on Google that come up with a TO-200 heatsink fastener like this.  Now I was planning on reassembling with screws and nuts...but MANY MAJOR semiconductors on the Nidecs use these and the last one took me a screw extractor and 25 minutes to actually get it out (not fun).

Can anyone point me in the right direction to find this special hand-tool that allows me to remove and reinstall these fasteners?  It's obviously some manufacturer's old joke...but I stopped laughing two fasteners ago.

No it's not T-6, not Hex, not a square drive, not a star drive, etc...tried the entire ifixit bit kit...I can temporarily JAM bit into it, but it's so soft that after a 1/4-1/2 of a turn...it starts grinding and not catching on the inside and the bit will spin (by hand of course).

Thanks for any help you can give.
weblacky
I play an SGI Doctor, on daytime TV.

Trade Count: (10)
Posts: 1,716
Threads: 88
Joined: Jan 2019
Location: Seattle, WA
Find Reply
10-06-2021, 01:25 AM
#2
RE: Can anyone identify the special tool required for these heatsink screws?
That's not a normal fastener used anywhere I've seen, that would be proprietary to nidec I be. I would Dremel a slot onto it and use a wide flathead. That's what I usually do, or I have my friend weld a nut onto the end.

I'm the system admin of this site. Private security technician, licensed locksmith, hack of a c developer and vintage computer enthusiast. 

https://contrib.irixnet.org/raion/ -- contributions and pieces that I'm working on currently. 

https://codeberg.org/SolusRaion -- Code repos I control

Technical problems should be sent my way.
Raion
Chief IRIX Officer

Trade Count: (9)
Posts: 4,239
Threads: 533
Joined: Nov 2017
Location: Eastern Virginia
Website Find Reply
10-06-2021, 02:42 AM
#3
RE: Can anyone identify the special tool required for these heatsink screws?
Dremeling a slotted head failed as the head is too thin (like a trim/flashing more than a head), once you have any line in it, just rips and bends. The screw-out driver bit was the best but it's very hard, this time I have the heatsink out, last time I was dealing with the giant body heatsink in the Nidec that was a single metal piece for like 6 ICs and couldn't be removed...so I had to move it with a screw extractor, then get ahold of it with pliers and 1/4 turn it for 4 minutes to remove it (trashing the head).

This is the first time I've encountered having to remove the ICs from the Nidec's heatsink (common heatsink), this one happens to be on it's own...so removible. But the others share a heatsink and removal isn't feasible unless I want to gently remove ALL diodes on the secondary phase sharing that heatsink.

I was hoping someone had seen this bit in production. It's made to be so delicate that even if you jam a square bit in it and turn, you'll get 1/2 before the metal deforms and the bit strips and turns. I was lucky on another one to get 1 full turn out of it, which made the head come away from the heatsink just enough to grab with pliers and forcibly turn.

The welding idea isn't too bad, shame I cannot like fill ii with solder and form a new (small) hex indent in it and turn with a hex key...

Ah, well that one was easier, I jammed a square-drive 1/8" bit in it, and this one had a nut, so I used pliers to wiggle the nut, once moving, I just unscrewed it via the square drive, came off A LOT easier than the same fasteners that actually threaded INTO the large heatsink in the start of the LV area. So this was easier (though I'll be putting a modern assembly back in). I still have to fix one I did before, maybe I'll grease this fastener up and try to reinstall it where I mangled the first one...

The recovery diodes on the Nidec are very hard to access. You can get to them much easier when the caps are out, but I guess I need to expand my "pre-reassembly" testing to include more diodes. The only issue is, most tests I've tried don't really work conclusively because they're all connected together in some way (one is short they all come up short), also this diode is somehow alone from the others. It's massive (200V 16A) for the day so it's a central diode. I guess I'll need to document where it's connected to find an easy placement for testing the region before caps go back in. I tried several line tests but they don't come up any different, so this diode must have somehow been part of the HV area or the standby area? I'll hopefully figure it out better...or not.
(This post was last modified: 10-06-2021, 03:39 AM by weblacky.)
weblacky
I play an SGI Doctor, on daytime TV.

Trade Count: (10)
Posts: 1,716
Threads: 88
Joined: Jan 2019
Location: Seattle, WA
Find Reply
10-06-2021, 02:57 AM


Forum Jump:


Users browsing this thread: 1 Guest(s)